Debra Keirce


Military Life: Maria Bennett Hock Guest Blogger

Figure artist Maria Bennett Hock is a friend of mine who is painting tender moments of life in the armed forces. In honor of Memorial Day this month, I asked to share her blog post about a series of works she is currently creating. Thank you sincerely, to all of the men and women who serve, and to their families. 


Military Life Series 

I have an ongoing series depicting scenes from military life.  As a military brat (which is the term lovingly used for children of military parents), military spouse and military mom, I have extensive exposure to the military lifestyle…its trials and tribulations, its joys and adventures.  I have been compiling memories and stories from friends and family to capture these memories on canvas.  I paint from my heart and express emotion in my work.  I have the ideas, the memories, and the stories. What I lack are the models to depict these scenes.  I have a small group of neighbors that will pose for me setting up scenarios and portraying my memories.  Some I can paint from life and some I must photograph to work on my own in the studio.  I am always on the lookout for appropriate models to come and pose for me.  
I painted this as a representation of a family getting ready for deployment.  The father is going overseas for a number of months...up to a year.  It is not easy for families to endure these separations, but military families are tough.  
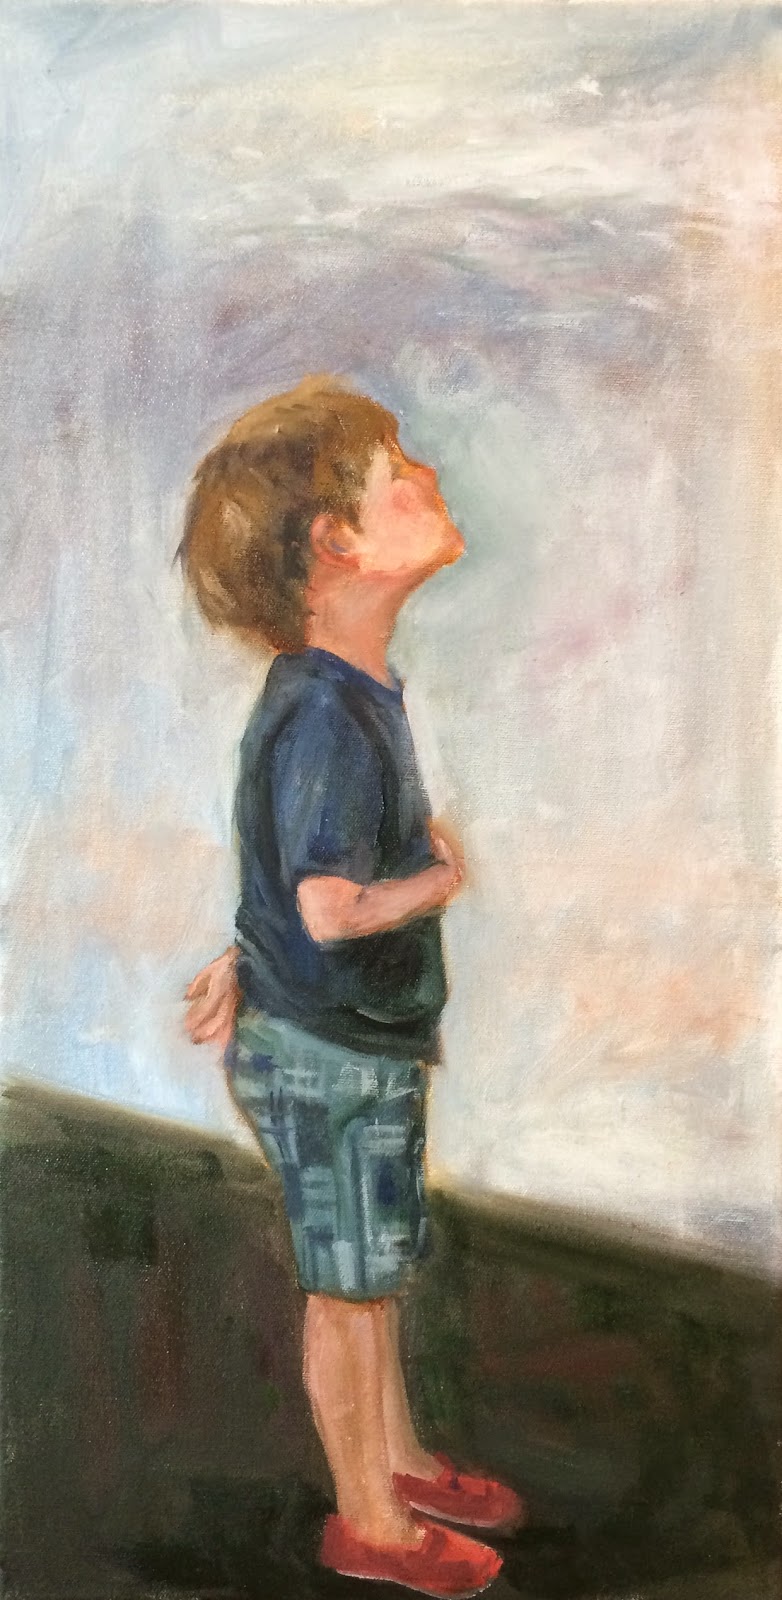
This piece shows a young child with his hand over his heart as they play taps at the end of the day.  On a military installation, music is piped through a loudspeaker at sundown.  As soon as the music starts, activity stops.  Everyone stands and either salutes or places their hand over their heart and faces the flag. If they cannot see the flag, they face the general direction. This is done as a sign of respect for the lowering of the flag.  As soon as the music stops, activity resumes.  
I did this portrait of my son when he was deployed to Afghanistan.  It was shown at a local gallery. When my daughter in law visited she leaned over to give him a kiss.  I thought it was a perfect moment.  I did a painting of this scene and then gifted it to my daughter in law.  

Would you like to immortalize your military life moment in an original painting?
If you have any stories of military experiences that you think will add to my series I would love to hear from you!  Whether you would like to commission a painting, or just model for one, I am thrilled to speak with you. Please send stories and/or pictures by commenting on this blog post, or at THIS LINK, or contact me through my website HERE.  Of course if anyone lives in Northern Virginia or the Raleigh, NC area and would be kind enough to model...my door is always open and my schedule is flexible!  
Please forward this to anyone you know who might enjoy.
Thank you to Maria Bennett Hock for guest blogging for me!


#Military #ArmedForces #Army #Navy #Airforce #Marines #MemorialDay #MilitaryFamilies #veterans

Read Full Post


RSS Feed and Feed Readers - Explained

RSS stands for "Rich Site Summary." You sound really smart when you let people know you know this.


Has this happened to you? 


You find an amazing blog post, and want to subscribe to have emails sent to you every time new info is posted. But alas, there is no place to sign up for email updates - just a link to RSS, that orange square icon with white sound waves on it. What the heck is RSS?


And when you click on it, you get something that asks if you want to add it to shared links. (What are shared links anyway?) You click cancel, and a pop up window tells you there is no software on your computer to open RSS. It offers to send you to the App store if you are on a Mac. You go, and a bunch of seemingly unrelated apps pop up. At this point, you GIVE up!!  Or at least I do. 


After doing this for years, I finally wrote to my friendly Fine Art Studios Online website artist support agent. Marsha was incredibly helpful, and I've supplied her answer below. But here's what I ended up doing. 


I went to Feedly.com. Why? A cursory web search indicated this feed reader is web based, so you don't have to download anything. You can log in with your google or Facebook account, so you don't have to enter any new passwords or information. It is rated as one of the most popular feed readers out there currently. Google used to have one, but they quit their reader and now endorse Feedly.com. Since I am convinced Google will one day succeed in world domination, we may as well get on their good side now, right?


At Feedly.com, you sign in and viola! They even have the RSS feeds from blogs I followed in the early 1990's before I even knew what a blog was!  After getting over the shock at how much Feedly knows about me - more than I remember about me, and I AM me - I settled in with a cup of coffee and read through my RSS feed.


I am now secure in the knowledge that I have done something 21st century people do!


Here is how to add my blog, or any blog, but I'd love it if you'd add my blog, to your Feedly reader!


Go to my blog. 


Now go to the right hand column and click on "Follow this blog" there under the archives.


Next, you may get a pop up window that asks to add to shared links. You can do that later if you like, but for now please click "Cancel."


Another friendly pop up window will appear. From this, you want the URL. For my blog, the URL is 


feed://data.fineartstudioonline.com/rssfeed.asp?id=27768


Highlight and Copy this URL.


Now, go to Feedly.com and sign in. See where it says "Add Content" on the left side? Click on that.


Paste the URL you copied into the search bar.


Now, see that green square with a plus sign in it? Click on it, and you will have the blog added to your feed.


Whenever you want to read through some blogs, just go to feedly.com, sign in and peruse your list. I hope you find this useful!


-------------------------------------------

FROM MARSHA -


Debra,
We do not have anyway for persons to be notified of blog posts via email nor any way to have your email newsletter subscribers 'sign up' for your blog.

One of the things people love about blogs is that they are NOT dependent upon email.

Each individual will have to choose to sign up to receive your blog posts via the RSS feed link, using the RSS feed reader on their computer.

An interested collector who signs up for your feed will be 'notified' by the feed reader on 'his' computer when you have added a new blog post.

-------------------------------------------------
  
Email is becoming problematical as a content delivery method. Inboxes are flooded with spam and filters are getting more aggressive. Delivery of email is down to 34%. People no longer want to give out their email addresses as they know they are going to receive more junk mail.

The Ponemon Institute's recent study on trust and credibility in marketing revealed that over 80% of those surveyed do want to hear from companies they have dealt with. However, they only want to receive material that is relevant to them, based on their past purchasing habits and they want it delivered in a way that they can control.

RSS fits all these parameters. It is a secure delivery method. RSS has a 100% delivery rate. Subscriptions are anonymous. There is no spam. If the content no longer appeals to the reader they can unsubscribe with one click - and they are actually unsubscribed!

For more info on RSS feeds please see the following articles from Clint's FineArtViews.com newsletter:

UNDERSTANDING Feed Readers...Here is a wealth of info for you to peruse:

From FASO Founder Clint Watson's FineArtViews.com newsletter:

RSS Feed Know How for the Feed Frazzled
http://theextraordinarypencil.blogspot.com/2008/03/feed-know-howfor-feed-frazzled.html

Feed Your Artwork to Your Fans with RSS
http://faso.com/fineartviews/1714/feed-your-artwork-to-your-fans-with-rss

Web Traffic Driver #9: Build RSS Subscribers
http://faso.com/fineartviews/1793/web-traffic-driver-9-build-rss-subscribers

-----------------------

And - there are these sites that have more information than most of us ever need.

An article with some basic info on RSS feeds:
http://www.rss-specifications.com/what-is-rss.htm

http://kb.mozillazine.org/Thunderbird_:_FAQs_:_RSS_Basics

http://www.press-feed.com/howitworks/rss_tutorial.php#howarefeedsdifferent


I have a few blogs and sites that I follow regularly. Their updates come directly into my reader - all organized by website. (not mixed up with other stuff in my personal email account)  

I sit down with my coffee in the mornings and check my reader.  Much more enjoyable and efficient than email.

Sincerely,Marsha Robinett
Artist Support Agent


Read Full Post


Photo Editing with Free Software, GIMP

I am often asked what software I use to edit photos of my paintings, so I thought I'd write a blog post showing what I do. There are so many great ways to accomplish this, but I have been using GIMP, a free software I downloaded for the first time about ten years ago. Since then, I've purchased versions of Photoshop and experimented with other programs, but I keep going back to GIMP. I'm just familiar enough with it to be dangerous. But I seem to be able to do all the things my friends who pay hundreds of dollars do with other software programs.


Also, if you have any question about how to do anything at all in GIMP, do a google search. With the word GIMP and your question in the search bar, I could almost guarantee you will always find the answer you need. There's just THAT much information on GIMP on the internet. YouTube videos, chat rooms, the GIMP tutorials... I have yet to ask a question and not find the answer.  This is important for me, because I am always full of questions. 


Here is what I do with GIMP each time I want to photograph my artwork:


I'll write another post about my Canon Rebel camera and taking photos, but notice that for rectangular pieces, I photograph them sideways for the least distortion and so I can grab the most pixels. Once you download GIMP to your computer, drag the photo you want to edit over to the GIMP icon to open it in GIMP.

To rotate the image, go to the bar at the top of your computer screen. See the "Tools" tab? Click on it. Where it drops down to "Transform" click on that. See "Rotate"? Click there too. Now. There is a small screen that pops up and the highlighted place is where you enter the degree of rotation. In this case, I enter 90. I hit return, and viola. My image is upright. 


Please note that this is a really useful tool, because sometimes you want to rotate an image just 2 or 3 or 30 degrees. You can do this. To rotate it in the counterclockwise direction, just insert a minus sign (dash) before the number. For example, -90. You can even use fractions if you want it to rotate, say 90.23 degrees. I have not found another free photo editing software that allows you this fine tuning in rotation. It's awesome!


After you rotate the image, you may need to adjust the size you are viewing in order to continue, depending on your computer monitor. This is easy. Just go to the bar below the image where you can choose to view it in inches, pixels, mm, etc. See that number? Change it to something bigger or smaller until the image is the size you want it to be for viewing. This doesn't change the size of your saved image - just the size it appears on your monitor.


If you do not see your whole image after rotating and resizing, you may need to go to the "Image" tab at the top of your screen. See the drop down option "Fit Canvas to Layers"? Click that and you are good to go.


Okay - It's subtle, but see what I did here?  I squared up the image so it is now a rectangle instead of a trapezoid. It now appears as though I am looking at it straight on. It's often useful to intentionally photograph your work at an angle so you can avoid glare. Squaring it back up to a rectangle is easy with GIMP. 


Do this. Go to the "Tools" tab at the top of your screen. Click on the drop down option "Transform." Then click on the drop down option "Perspective." A grid appears to help you see how NOT square your image is. I have found that it is most successful if you correct your image by making it smaller, instead of making it bigger. So, grab (i.e. click and drag) one of the four corners and move it toward the center of the image until you have lined up the vertical and horizontal edges of your rectangle. After you click and drag, wait for a few seconds before you release your click. When the image adjusts to where you have your pointer, then you can let go of the click. 


Do this for all 4 corners and hit the "Transform" blue button on the small "Perspective" menu that popped up when you chose the perspective option. After the image adjusts, click on it so the grid pops up again. Now you can see how close to a true rectangle you are. Repeat the steps above if you need to adjust it further. 


On to the cropping. Go to - you guessed it!  - the "Tools" tab. Choose "Transform" in the drop down menu. Choose "Crop" in the drop down options. Click and drag to choose the cropping and hit return. You're there!

At this point, I typically feel like I need to adjust the brightness and contrast on my paintings, to get the image to match what it looks like in real life. This is tricky, I know, because different monitors show different color and brightness variations. All I can do is to make it look good on my computer, so right or wrong, that's what I shoot for. I have learned to stay away from adjusting colors. I only fiddle with the brightness and contrast. Here's how. 


Go to the "Colors" tab at the top of your GIMP screen. Choose "Brightness and Contrast" in the drop down menu. Make your adjustments and hit "OK" in the pop up window for that tool. 


There are a lot of really cool editing tools you can experiment with. Under the "Tools" tab at the top of your screen, choose "New Toolbox" and a toolbox will show up. If you hover over each of the icons in it, the title of each tool will pop up. I found the best way to learn about them was to experiment. I often use the "color picker" and "paintbrush" tools to choose a color and then paint over specks of dust on frames. You can also use these tools to adjust photo references. But that's a topic for another blog post. 


Now you can go to "Tools" and "Transform" and "Crop" again to crop out the frame. Hit return, and you are done!


At any step along the way, you can save your image. To do this, go to the "FILE" tab at the top of your screen. Click on "Export As" in the drop down menu. Here you have choices. Choose what to name your file, where on your computer you want to save it to, and if you click on the arrow next to "Select File Type  (By Extension)" in the pop up window for exporting, you have the option to save your file as a TIFF file. I have never done this. Every publication I have been in asks for JPG files. In the last century, TIFF files were the norm for print publication files, because they are less corrupted over continued opening and closing. So far, I've sold each painting BEFORE anybody has asked for a TIFF file. But, it's there if you think you need it. Hit the blue "Export" button. 


A smaller pop up window appears and now your can choose the quality of your image. This amounts to the number of pixels. I save 100% at this point. You can also make some advanced option changes here. Hit export and you are done. 


Another thing you can do, is to scale your image. This is a really useful tool, as competitions and publications often want an image to be a specific number of pixels or inches. To do this, click on the "Image" tab at the top of your GIMP screen. Then choose "Scale Image" in the drop down menu. See the little pop up window where you can choose units of pixels, picas (what the heck is a pica?), millimeters, feet, yards, etc? Choose. You can also choose resolution. 72 Pixels/Inch is great for the internet. We call this low resolution. When someone asks for high resolution photos, you can change this number to 300. Note that when you do this, the image size will decrease. Whatever your resolution is, you only have a set number of pixels to work with. So you can choose to have a huge image with fewer pixels per square inch, or a very crisp image with lots of pixels per square inch, but in a reduced size. The human eye cannot distinguish higher than a few hundred pixels/inch, so anything above 300 pixels per inch resolution is lost on humans. There are machines out there that sometimes appreciate it though...hi res printers and such. 


Also note that when you adjust the image size and quality, there is that little link next to the numbers. Click on that link icon to be sure the height changes when you alter the width, and the x resolution (horizontal) alterations result in y resolution (vertical) changes. If you make changes without linking these attributes, you can get some wacky stuff going on. 


Below, is a 300 pixel/square inch image of the same 72 pixel/square inch image shown above.  If you zoom in on your computer screen, you can see the difference. If your eyes are like mine, they look pretty much the same unmagnified. So, like I said, 72 ppi (pixels per inch) is fine on the internet.

I hope that helps, and I hope you are now more able to share your beautiful art - and any other images you care to share - with the world. The earth gets prettier every time we share a beautiful piece of art. Thank you for reading!!


To stay up to date on the happenings in my studio, please sign up for my newsletter by clicking HERE.

Read Full Post